Cooking rice

A dish with brown sticky rice on the left, and basmati rice on the right.

Many people struggle to cook good rice, particularly brown rice which is certainly more challenging. But rice is probably the most widely eaten grain in the world, and with a few simple little tricks, its not as hard as you might think it is.

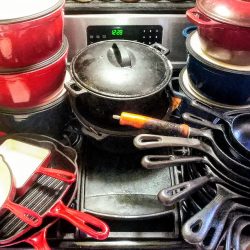
Its important to know what kind of rice you have, since each type of rice cooks a little differently, and is used for different purposes. The upper left rice in the photo above is a brown sticky rice, and is typically used for sushi and dessert preparations; I cooked this one with the pasta method, which I will explain down below. The upper right hand corner is Arborio rice, which is an Italian medium length rice grain, and is used for making risotto, a dish that I will be doing later this week, The lower left is a jasmine rice, a long grain rice that has a beautiful scented rice that comes from south East Asia. In the lower right is basmati rice, an extra long grain rice that has a rice nutty flavour, and my personal go-to rice for most dishes.

To successfully cook brown rice, I tend to go with what is referred to as the pasta method. Its pretty simple, just like pasta, you are going to cook it in an excessive amount of water. In the video below, I used about 4-5 cups of water to cook 1/2 cup of rice. It took nearly 45 minutes, and there was very little water left. Don’t forget to salt your water.

Basmati rice, as I noted, is my go-to rice, but does not use the traditional 2-to-1 water to rice ratio that most think of when cooking rice, and there are a few extra steps that I follow, but it makes a huge difference. Try this method next time.

  1. Wash rice under cold running water. I tend to use a strainer, but you can do it in a bowl. The goal is to see nice clear water so that you know you have washed all excess outer starch off of the rice.
  2. Add your rice to the pot and water at a 7-to-4 ratio. This means for every cup of rice that you have you should use 1 &3/4 cups of water. Toss in 1/2 tsp of salt.
  3. Let the rice sit in the cold water for 10 minutes.
  4. After the rice has sat, bring to a boil, and reduce the heat to low, allowing to simmer for 10 minutes.
  5. After it as simmered, remove from the heat, and let it sit for 10 minutes.
  6. Fluff with a fork and serve.

Raspberry Meringue Pie

I love raspberries. They are close to the top of the list for my all time favourite berry, probably only edged out by partridgeberry. The sweet tangy taste makes them one of my go-to berries for desserts frequently.

This pie is a twist on the classic lemon meringue pie and is made in the exact same way. I simply substitute the lemon juice for raspberry juice, and viola, an instant twist hit of a classic dessert.

Its much easier to make than most people realize, and doesn’t have too many ingredients.

Sugar340g1.5 cups
cornstarch65g1/3 cup
salt1g1/4 tsp
raspberry juice250ml1 cup
egg yolks4
butter30g2 tbsp
water (boiling)375ml1.5cups

To get the raspberry juice, I used some frozen raspberries I had, and simply simmered them out with some water, with it being about 2 cups of frozen berries with 1 cup of water. I passed this through a fine mesh sieve once the berries had completely broken down and I had a nice juice. Set to the side.

Sift together the sugar, cornstarch, and salt. I did this right in the pot I was going to cook in simply to avoid having extra dishes to wash. Next, slowly whisk in the raspberry juice and make sure that everything is well mixed. If your juice was warm, like mine was, you will want to add your butter next. This is a great way to make sure that the mixture is not too hot for the egg yolks, since butter melts at very low temperatures. You can then add your egg yolks, and again, combine well. Finally, you will need to add the boiling water, and make sure that you are constantly whisking as you do this.

With that done, place it over medium-high heat, and bring to a boil. I recommend constantly stirring to avoid it burning on the bottom. Once it has come to a boil, reduce the heat and keep stirring until the curd is set and you have a nice thick liquid. This whole process should take around 10-12 minutes

Take the curd and pour it into a pre-made pie crust. I have a great recipe for a no-fail pie crust, and you really should use a mealy crust for this. Set to the side and move onto your meringue, which uses the 4 egg whites from the eggs you previously separated, and 60g or 1/4 cup of sugar. Its best to use a wide bowl and to have your egg whites at room temperature.

Begin by whipping your egg whites and keep going until you reach the soft peak stage. This means that you should get peaks that form when you pull the beaters out, but that they tip over. At this point, you can slowly add your sugar while continue to beat until you have reached the stiff peak stage. At this point, the meringue should look glossy and be able to hold its peak. Take care not to beat too long, or you can end up with a dry and stringy meringue.

Add to the top of your pie, and spread. Its important to ensure that you get your meringue right to the edge of the crust, otherwise it has a tendency to shrink while browning. Place in a 425F oven and allow the meringue to brown. I chose to do mine under the broiler, which you can do, but you must take care to ensure that it does not burn.

Dicing carrots

I decided to take last week off after a busy Thanksgiving weekend, but I am back at it again.

For this week’s Technical Tuesday video, I decided to go back to basics, and demonstrate how to properly and more importantly safely dice a carrot.

Yes, its easy to hack a carrot into a bunch of pieces, but there is something very satisfying about taking the time to properly dice vegetables, especially when making something like a soup.

And it makes a difference to how it cooks. When the pieces of vegetables are different sizes, they cook at different rates, and will have different textures. Taking the time to cut nice dice will mean that your vegetables all have a consistent texture.

Pumpkin Pie with Orange Zest

Fresh out the oven pumpkin pie

Happy Thanksgiving everyone. This will be a weekend of turkey and gravy, and of course pumpkin pie. I love pumpkin pie. Its one of my favourite desserts, and its much easier to make than most people realize.

Today’s video shows how easy it is to make this classic with a twist. My video on Tuesday past, was all about making pie crust, which you can check out if you have not seen yet. Using my no-fail pie crust recipe, you can ready for the filling to end up with the tastiest pie for your Thanksgiving Dinner. You will need the following list of ingredients, which I have given with both weights and volume measurements:

140g2/3cbrown sugar
1tspcinnamon
½tspginger
½tspnutmeg
¼tspallspice
2eggs
½tspvanilla
250ml1cupmilk
zest of 1orange
275g1⅓cuppumpkin
  1. Preheat oven to 450F.
  2. Begin by mixing the flour, salt, and spices.
  3. Add eggs and vanilla and mix well.
  4. Zest orange and add to the mixture.
  5. Cut the orange in half and juice out the orange. Add enough water to get ½cup of liquid and add to mixture. Add the milk and pumpkin and blend thoroughly.
  6. Place pie crust into the oven and fill with pumpkin filling mixture.
  7. After 10 minutes, reduce heat to 325F. Check after 40 minutes. It took me just over 50 minutes at 350F. Take care not to overcook.
  8. Remove from oven and allow to cool

Have a great Thanksgiving Dinner.

No fail pie crust

my pie crust ready to go into the oven, or in this case, the fridge for a couple of days.

This week’s Technical Tuesday video and post is late ironically because of a technical issue. I normally edit my videos late Monday evenings, and sat down to do so last evening, only to discover that I had forgot to change the time lapse setting I had been using on one of my cameras. I had to reshoot it all today, but I digress….

This coming weekend is Thanksgiving weekend here in Canada, and like many of you, I will be having pumpkin pie for dessert. So I thought this was the perfect chance to show you how to make a no-fail pie crust. Pie crusts are one of those things that so many people hate making, but it is much easier than you realize, and with a little practice you can master it as well.

First thing, first is the proportions. Like so many things in the kitchen, it comes down to ratios. If you have seen any of my videos, or read any of my posts, you will know that I love my kitchen scale, and believe that weighing your items is much simpler and certainly far more accurate. With this pie crust recipe, nay, formula, it could not be easier to remember. 3 parts flour, 2 parts butter, and 1 part water. In the video below, I use 300g of AP flour, 200g of salted butter, and 100g of ice cold water.

Now, if you don’t have a kitchen scale, you really should, but for now, you can use 2 cups of flour, 1 cup of butter, and 3.5 fl.oz. of water to get pretty darn close.

Begin by cutting the butter into the flour. The goal is to get small pieces of butter that are coated in flour. If this is for a top crust, you want a flaky pie crust, and you are looking for pieces of butter about the size of corn nibs. For bottom crusts, and honestly, it works well for top crusts as well, you are looking for rice size pieces of butter. But never forget, the goal is not to completely blend the flour and butter together; its about cutting the butter and coating it with the flour.

Once your butter has been cut through, add your water and just mix enough to pull together a dough. The less you mix this, the more tender your crust will be. Mixing will develop gluten, and this will give you a tough and chewy crust.

Roll it out and place it in the pan. Watch the video to see how you can use the rolling pin to lift your crust without ripping it. Don’t forget to poke some holes into it to allow some of the steam to escape.

Now, if you are intending to use this for a cream pie or a lemon meringue pie, or something that requires a baked crust, you will want to blind bake. This means that you will want to weigh it down; I use dried white beans. I also add a piece of parchment paper to make it easier to remove the beans after its cooked. Pop it in at 350F and wait until golden brown, about 25-30 minutes.

Sole meunière

Sole meunière is truly a classic of French cooking, and is a classic for a reason. Each year, I teach this dish as part of the fish course and my students are always blown away with how tasty this very simple dish is. It really proves that simplicity is the key to really great meals.

The only thing you need for this dish is your sole, or really any other white fish, some flour, salt and pepper, a lemon, some parsley, and the star of the dish, butter. And you really want real butter if at all possible.

Now, the real success to this dish, just like most dishes, is the mise en place, better understood as the pre-preparation before you even turn on your stove. As you watch the video, you will notice that the rice and peas that I served with my dish are started before I even do any of the prep for the sole. The fish will cook very quickly, so you need to make sure that everything is ready to go.

I start by preparing some very thin slices of lemon without any peels. These get placed directly on top of the fish. The next thing I do is chop up some parsley, but you can use dry if you want. If you are using dry, you can place a small amount in a bowl and cover with a very small amount of hot water, which will allow the parsley to rehydrate and will be closer to fresh parsley.

With this complete, add a bit of butter to your skillet and turn on to a medium heat. We want our butter to melt and get a little frothy. While the butter is melting, season your sole fillets with salt and pepper. I opted for white pepper, but feel free to use black pepper. Then lightly coat the fish with flour, and shake any excess flour off.

Place your fillets in the pan flesh side down. We always should start our fish, or any protein really, with the presentation side, and when it comes to fish, that is the flesh side, or the inside. The skin side should be against the plate. Make sure that your pan is not too hot. Once browned, carefully flip and finish cooking.

Place the cooked fish on a plate, and top with your lemon slices. I forgot to do the next step, but was still happy with how it came out. Once your lemon slices are on, give a little squeeze of the other half of the lemon over the top of the fish; I went for extra slices of fish, and then sprinkle a little parsley over the top.

The next step is to prepare a beurre noisette, or brown butter. Simply place some butter in a skillet or small pot and allow to melt and start to colour. You certainly don’t want the heat to be too high, or your will burn your butter. Keep a close eye, and just as some colour starts to develop, remove from the heat. The heat left in the pan will be more than enough to finish the butter. Pour over the top of the fish, and serve.

Perfecting poached eggs

I love poached eggs. A poached egg on toast is such a simple but elegant meal. Watching the runny yolk spread across the toast is a beautiful thing to watch surpassed on by how amazing it tastes. Perfecting your poached eggs, like so many other kitchen skills, is not difficult, and with a few quick tips, you might find your poached eggs go from good to great.

This is Technical Tuesday, so here is a little technical information for you. Egg whites are primarily a protein called albumen, and acids cause proteins to coagulate. With this in mind, we can simply increase the acidity of our poaching liquid to give our eggs a little help in firming up by adding some vinegar to our water. There doesn’t need to be a lot of vinegar, about a 5ml (1tsp) for each litre of water that you are using. This will increase the acidity without it impacting the flavour of the egg. And of course, don’t forget to add salt to you water, about a tsp of that as well.

The other tip I will offer is about the water temperature. We want to poach our eggs, not boil them. You want to bring your water to a simmer, and then reduce the temperature of the stove. We should see a few bubbles coming from the bottom of the pot, but if the water is too hot, and there is too much action in the water, the eggs will not have the chance to properly coagulate and will end up falling apart.

Make sure to start your toast ahead of dropping your eggs in the water. In this video I poached the eggs for 4 minutes to get perfectly firm egg whites while having a nice runny egg yolk.

Cod fish tacos

Fish tacos with wild Newfoundland cod fish

I love fish tacos. There are so many different ways that you can make them, and when done well, they are as close to the perfect bite as you can get hitting all the flavour notes.

This is one variation that I like to make. In today’s video, I make a quick seasoning for the cod and give it a quick pan fry. Other times, I use a tempura style batter on the fish, or different seasonings. For today’s seasoning I use:

1/2 tsp cumin powder
1/2 tsp chili powder
1/4 tsp garlic powder
1/4 tsp cayenne powder
1/2 tsp salt
1/4 tsp ground black pepper

Simply mix the ingredients together and sprinkle on both sides of the fish, and fry in a skillet.

I used a mayonnaise based sauce to add a little moisture and of course flavour to the taco. My sauce included:

1/4 cup mayonnaise
1 tbsp lime juice
hot sauce to taste
water (to get correct consistency for a sauce)

Whisk together and set to the side.

Now you will also need something to give the tacos some crunch and extra flavour. I used shredded red cabbage and sliced shallots with a squeeze of lime juice over the cooked fish, but there are many other options that can be used. Some of my other favourite condiments and toppings include pickled onions, guacamole or sliced avocado, sliced radish, corn relish, coleslaw, green salsa, fresh salsa, and so many other options.

Wrap the works in a soft flour tortilla and you have a great appetizer or paired with a side for a full meal.

Handwashing in the kitchen

All of my posts up until now have been directly about food or kitchen tools, but it occurred to me that there was a very important skill that I had not yet addressed. And its one of the first things I teach my students before they even enter into the kitchen.

Handwashing.

And now that we are in the midst of the Covid-19 global pandemic, proper handwashing techniques are even more important.

Check out my video to see how I was taught, and what I teach my students to do before entering the kitchen.

Roasting and Smoking a chicken

If you have read my blog before, or if you have watched my videos before, you probably realize that I love good BBQ, and that includes roasting and smoking whole chickens. However, roasting a whole chicken on a BBQ or on a propane grill can be challenge to have properly cooked.

Using a spatchcock chicken is one way to to speed up the process of cooking a whole chicken while making sure that it cooks fully through. You can read more about the process here, which also includes a link to the video demonstrating how to execute this technique.

I keep this weeks chicken very simple and only use salt, pepper, and some oil on the chicken. This works great and means that I am most just tasting the the smoke from my charcoal and smoking chips that I sprinkled in. It works great on a propane grill as well. Make sure to cook this using indirect heat. You will notice that I have all of my charcoal pushed to the side so that the chicken is not directly over the coals.

If you are using a propane grill, crank up the entire grill to make sure that it is as hot as possible, but then turn off one side, and place the chicken on the side that is turned off.

This will also work really well in an oven, just set to 450F.